Most bifold doors come in sizes ranging from 24” to 72” in terms of width. The size graduates in even increments of either 12”, 6”, or 2”.
In case your door opening is odd-sized, a ready made door won’t fit. In this case, you’ll need to build a customized bifold door. Read on to learn how to build a bifold door.
Bifold Lingo
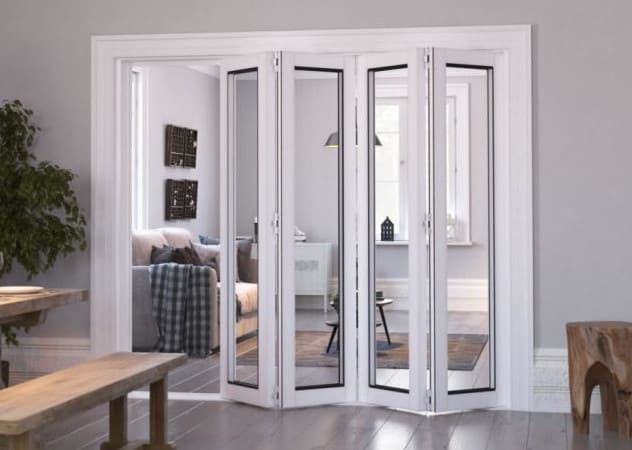
Bifold doors derive their name from the fact that they fold over each other when opening them. Common lingo in the building industry may refer to a bifold door using a sort of coded language.
For instance, a bifold door measuring 3’0” is pronounced by builders as “three-oh” and features a width of 36”.
The standard height of a typical bifold door is 80”. The size of a bifold door is based on the total width of all the panels making up the door.
Bifold Anatomy
Typical bifold panels have a hollow core, just like most interior doors. They comprise of two thin plywood panels fitted on a wooden frame.
Wider doors with a hollow core come with a cardboard filler within the core. The panels making up a bifold door don’t require fillers since they’re narrower than regular interior doors.
Building a Bifold Door
Most bifold doors use a Luan plywood with a thickness of 1/8” for the backside and front side. Higher quality bifold doors are built with plywood featuring a ¼” thickness.
If you want a stylish bifolding door, then build it with hardwood plywood. An economy bifold can be made with fir plywood, which is sourced from fir lumber.
Steps to follow when building a bifold door
Step #1: Measuring the Door Opening
First, take measurements for the width. In case you’re measuring the width for the rough door opening, then add 1″ for the drywall or exactly 1 ½” for lumber with a thickness of ¾”.
Next, take the height measurements. In this case, subtract ½” for the top drywall and another ½” at the bottom if you’ll be adding a floor covering. Remember to note down the height and width of the door opening on a notebook.
Step #2: Dividing the Measurements
Measure the door width and divide it equally according to the number of door panels. For instance, a bifold door with a width of 36″ at most will have two panels with equal widths. Divide the size of the door opening depending on the number of panels required.
Step #3: Subtracting for the Hinges
Next, subtract exactly 1/16” from each door panel that requires being hinged onto another panel. That way, you’ll have a gap of 1/8” between the panels. Next, subtract 1 ¾” from the door height to create space for the hardware and track.
Step #4: Cutting the Frame
Get a standard or compound miter saw to cut enough fir lumber measuring ¾” by 1 ½. Use it to make rectangular frames for each door panel. G
lue the joints generously. Get a brad nail gun and 2 ½” brad nails to assemble the frames. Use a butt joint or miter technique to make the frame joints.
Step #5: Installing the Plywood
Next, cut two ¼” pieces of plywood in a size similar to the frames. Next, apply glue generously on the front and rear of the door frame. Sandwich the frame between the plywood. Then square it out.
Next, place the door on two sawhorses. Pad and clamp the plywood after every 6”. Apply an equal amount of pressure on all sections of the door panel when clamping.
Step #6: Sanding and Finishing
Get some sandpaper (100-grit) and sand the panels. Next, apply a paint or stain of your choice. In case you opt to apply lacquer, ensure you apply two coats.
Sand the surface after applying the first coat with a 180-grit type of sandpaper. Give the paint or finish enough time to dry, preferably overnight.
Installing the Door Hardware
The instructions that come with hardware may vary depending on the manufacturer. Regardless, most hardware kits feature a top tracking system with pins and wheels.
First, take out the parts that come with the kit. Identify the parts. Parts may differ depending on the manufacturer. Nevertheless, the parts will include the wheel assembly and matching pins. The pins are often coated with nylon.
The kit will also include springs for the tracking system. Some kits also come with bushing in addition to the springs. The kit should also come with hinges and screws. Follow the manufacturer’s instructions when installing the hardware.
Step #1: Installing the Jamb Brackets
Take two brackets and center them on both sides of the door opening at the point where the floor meets the vertical door jambs. The jamb brackets are L-shaped, with the shorter side being vertical.
Place the vertical side over the jamb. Use a screwdriver or drill to screw the bracket over the jamb through the predrilled holes. Use the 1 ¼” screws that came with the hardware when screwing the bracket.
Step #2: Installing the Hinges
Lay the door panels abreast on a clean, flat surface. Screw one hinge 8” from the topmost part of the door. Screw another hinge 8” from the bottom most part of the door.
Use the screws that came with the door hinges. Center a third door hinge between the already installed hinges and screw it in place.
Step #3: Drilling for the Pins
Stand the hinged pairs by their edges such that the hinged edges face upward. Drill ½” holes at the center with a depth of 2” on the minimum. The holes should be dug 1” from the bottommost edge and opposite the already installed hinges.
Repeat the same for the bottom and top of the door. Do this for all pairs of the bifold doors. If you’re working on doors with three or more pairs of panels, only drill the outer pairs and skip the pair in the middle.
Step #4: Installing the Wheel and Top Pin
Take one of the bushings and top pin. Hammer them into the respective hole on the top. Also, hammer the wheel and bushing into their respective holes on the upper part of the door.
Step #5: Installing the Bottom Pin
Next, hammer the bottom pin and bushing into the respective bottom hole.
Step #6: Installing the Track
Take measurements of the width at the top section of your closet. Cut out the track according to the width measurements with the help of a hacksaw.
Install the bushings and springs into the created track according to the instructions of the manufacturer. When installing the track, center it front to rear at the respective hole on the upper part of the door. Use 1 ½” screws when installing the track.
Step #7: Hanging the Doors
Lift the bifold door and let it unfold. Push the pin and wheel into the tracking system simultaneously. The pin should go close to the wall while the wheel system should sit inside the track.
Push the door upward while tilting the bottom inward. Allow the knurled knob at the bottom to sit in the bottom jamb bracket, right in the jaws.
Step #8: Operating and Adjusting the Door
Try to operate the newly installed door. Open and close it to see whether it’s working properly. If it fails to move cleanly, rubs, or sticks, twist the knob at the bottom to adjust it upward or downward until the bifold door opens and closes smoothly.
Aluminium Bifold Doors Company in Sydney
Looking to install aluminium bifolding doors at your Sydney property? Reach out to our experts at https://aluminiumwindowsanddoors.net.au/bi-fold-doors-sydney/ for a free consultation call and quote.
Also read: How to Calculate the Rough Opening of an Aluminium Bifold Door