In this comprehensive guide, you will learn about the benefits of aluminium sliding doors, including energy efficiency, low maintenance, aesthetic appeal, space saving, durability, and security. The article will also cover various types of sliding doors such as standard, stacking, corner, automatic, and customized. You’ll gain insight into the necessary measurements and pre-installation preparations, as well as the assembly, securing, and post-installation checks required for a seamless installation. Moreover, you’ll discover maintenance and troubleshooting tips to ensure ongoing smooth operation and longevity of your aluminium sliding doors.
Benefits of Aluminium Sliding Doors
Aluminium sliding doors have gained popularity over the years, especially for residential and commercial properties, due to their various benefits. These doors not only offer an elegant and modern look but also provide a range of advantages compared to traditional wooden or PVC doors. In this article, we will discuss the six main benefits of aluminium sliding doors: energy efficiency, low maintenance, aesthetic appeal, space-saving, durability, and security.
Energy Efficiency
One of the most significant benefits of aluminium sliding doors is their energy efficiency, instrumental in regulating indoor temperatures and reducing energy bills. These doors typically feature double glazed glass, which helps keep warm air inside during winter and cool air inside during summer. The aluminium frames also provide excellent insulation, preventing heat transfer between the indoors and outdoors.
Furthermore, aluminium sliding doors allow maximum natural light to enter the room, which reduces the dependence on artificial lighting during daylight hours. The result is improved energy efficiency and sustainable living spaces, promoting a comfortable and environmentally friendly lifestyle.
Low Maintenance
Aluminium sliding doors require relatively low maintenance compared to wooden or PVC doors. Unlike wood, aluminium does not warp, rot or deteriorate over time, making it a reliable and long-lasting choice for doors. Additionally, aluminium is resistant to rust, corrosion, and fading even when exposed to harsh weather conditions.
As aluminium sliding doors can withstand environmental challenges, they require only minimal routine maintenance like cleaning the tracks and glass with mild soap and water. The colour and surface finishing of aluminium doors usually have extended lifespans without fading, eliminating the need for frequent painting or refinishing.
Aesthetic Appeal
The sleek and modern design of aluminium sliding doors enhances the aesthetic appeal of any property. Available in a wide range of colours, finishes, and styles, these doors can complement any architectural design, from traditional to contemporary. The slim frames and large glass panels create a seamless connection between indoor and outdoor spaces, providing unobstructed panoramic views.
Aluminium sliding doors can also be customized according to your preferences, allowing you to create a unique design that suits your property. Options such as dual-colour coating, wood grain finishes, and various glazing types can further enhance the appearance and functionality of your sliding doors.
Space Saving
A significant advantage of aluminium sliding doors is their space-saving design. Unlike traditional doors that swing open and require additional space for operation, sliding doors operate on tracks, allowing the panels to glide smoothly without occupying extra room. This feature is particularly beneficial in compact spaces or areas with limited room for door movement.
The sliding design also allows for larger openings, increasing the flow between indoor and outdoor spaces and creating a seamless transition for socializing or leisure activities.
Durability
Aluminium is known for its durable properties and resistance to harsh environmental conditions. Aluminium sliding doors demonstrate high structural strength and excellent performance, even in extreme weather conditions like heavy rain or strong winds.
The inherent strength of aluminium allows for slim frames and larger glass panels, maximizing daylight and views without sacrificing the door’s stability and performance. The doors’ durability and resistance to wear and tear also contribute to their extended lifespan, making aluminium sliding doors a long-lasting and economical choice.
Security
A crucial aspect to consider when selecting doors for your property is security, and aluminium sliding doors provide excellent protection against potential intruders. High-quality aluminium sliding doors are designed with robust locking systems and impact-resistant glass, making them more secure than traditional doors.
You can also opt for additional security features such as multi-point locks, reinforced glass, or alarm systems that integrate with the door’s structure for enhanced protection. With these security features in place, you can have peace of mind knowing that your property is well-guarded against potential break-in attempts.
Types of Aluminium Sliding Doors
Aluminium sliding doors not only offer convenience and style but are also an excellent choice for space-saving and energy efficiency. They create a modern and sleek appearance in any room and are available in various designs to suit individual preferences and architectural styles. In this article, we will explore the different types of aluminium sliding doors, their features, and benefits.
Standard Sliding Doors
Standard aluminium sliding doors are the most commonly used type for residential and commercial properties. These doors consist of one fixed panel and one sliding panel mounted on a track system, which allows the sliding panel to glide smoothly along the track. Standard sliding doors provide easy access while saving space as they do not require any extra room to swing inwards or outwards.
Aluminium is a popular choice for standard sliding doors due to its durability, low maintenance requirements, and resistance to corrosion. These doors also offer excellent thermal and sound insulation properties, making them energy-efficient and ensuring a comfortable space. Standard sliding doors are available in various sizes and colour options, providing an opportunity to create a cohesive design with the building’s theme.
Stacking Sliding Doors
Stacking sliding doors, also known as multi-slide or telescopic doors, are ideal for creating a seamless connection between the indoors and outdoors. These doors consist of multiple sliding panels that glide along a track system and stack over each other when opened, providing a wider opening than standard sliding doors. Stacking sliding doors are perfect for patios, balconies, and large living areas, allowing natural light to flood the space and enhancing the sense of openness.
Similar to standard sliding doors, stacking sliding doors made from aluminium offer durability, low maintenance, and energy efficiency. Moreover, these doors can be customized to include a variety of glass options, such as laminated glass or double-glazed units, to further enhance insulation and security.
Corner Sliding Doors
Corner sliding doors are designed to offer a sleek and stylish solution for connecting interior and exterior spaces. These doors are constructed with two sets of aluminium sliding doors that are connected at a 90-degree angle, allowing the architectural design to wrap around the corner of a building without the need for a supporting post. When fully opened, they create an uninterrupted view of the outdoors, making the space feel more expansive and inviting.
As with other aluminium sliding doors, corner sliding doors offer excellent durability, low maintenance, and insulation properties. They are also available in a range of colours and finishes, allowing for a cohesive design with the property’s architecture.
Automatic Sliding Doors
Automatic aluminium sliding doors are equipped with a motorized mechanism that controls the opening and closing of the door panels. They offer hands-free operational convenience, making them an ideal choice for commercial establishments, such as shops, offices, hospitals, and hotels.
Automatic sliding doors are known for their safety, as they use sensors to detect if an object or person is in the path of the door, preventing it from closing on them. They also help improve energy efficiency by only opening when necessary, reducing the amount of air exchange between indoor and outdoor spaces. As with other aluminium sliding doors, they offer durability and low maintenance, making them a popular choice for high-traffic areas.
Customized Sliding Doors
Customized aluminium sliding doors are made to suit the unique requirements and preferences of the user. These doors can be designed with various configurations, glass types, colours, and finishes to complement the property’s architecture or enhance its aesthetic appeal. Customization may also extend to the inclusion of specific security features or the integration of the sliding doors with other systems within the building, such as smart home automation.
In conclusion, there are various types of aluminium sliding doors available to suit different needs, preferences, and architectural styles. They offer numerous benefits, such as durability, low maintenance, energy efficiency, and customization options, making them an ideal choice for both residential and commercial properties.
Measuring the Installation Area
When installing a garage sliding door, it is essential to ensure that you have enough space and the proper structural support in place. This is done by carefully measuring the installation area before selecting the door and its components. In this article, we will discuss a few key steps in this process, including determining the door size, calculating clearance space, evaluating structural support, and checking for obstructions.
Determining the Door Size
The first step in measuring the installation area for your garage door is determining the size of the door itself. Garage doors are typically available in standard widths of 8, 9, 10, 12, 14, 15, and 16 feet, with heights ranging from 7 to 8 feet. It is crucial to choose a door size that is appropriate for your garage to avoid any difficulties during installation.
To measure the width and height of your garage door opening, use a tape measure to find the distance between the right and left sides and from the floor to the top of the opening. If your garage door opening is rectangular, ensure that the measurements are taken from the widest and tallest points. Record these measurements, as they will help you and your vendor select the proper size garage door for your installation.
Calculating Clearance Space
Once you have determined the garage door size, the next step is to calculate the necessary clearance space. This space is required for the door’s tracks, springs, and other components to function correctly. Measuring clearance space involves determining the headroom, sideroom, and backroom of your garage.
Headroom is the measure of space between the top of the door opening and the lowest point of the ceiling or any obstruction. On average, garage doors require a minimum of 12 to 15 inches of headroom for proper operation. However, some garage door models may require even more headroom, particularly those with extra features, such as insulation or windows. Consult your garage door manufacturer for the appropriate headroom required for your specific door model.
Sideroom refers to the space on either side of the garage door opening, between the wall and the door’s edge. Most garage doors require a minimum of 3.5 inches of sideroom for track installation.
Backroom is the space behind the door, extending from the opening until the point at which the door can be fully retracted. Generally, the backroom length should be the door height plus an additional 18 inches to accommodate the door’s hardware.
Evaluating Structural Support
Before installing a garage door, it is crucial to assess the structural support in the installation area. This includes checking the condition of the wood framing, as well as any existing garage door support structures, such as horizontal and vertical tracks.
Examine the wood framing for any signs of decay or damage, and ensure that it is level and square. If you notice any issues with the framing, these should be addressed before installing the door.
If you are replacing an existing garage door, inspect the tracks and other support elements to ensure they are in good condition and compatible with the new door. It may be necessary to replace some or all of the supporting hardware, depending on the findings of your inspection.
Checking for Obstructions
Before installing your new garage aluminium sliding door, it is crucial to inspect the garage’s interior and exterior for any potential obstructions. Examples of obstructions include light fixtures, electrical outlets, pipes, or ductwork. You may also need to remove shelving or storage units that could interfere with the door’s operation.
For the exterior, check for any obstacles that might prevent the door from opening and closing correctly. These could include shrubbery or other landscaping features, as well as any adjacent structures such as fences or garden sheds.
By taking the necessary precautions to measure the installation area and address any potential issues, you can ensure a successful and hassle-free garage door installation.
Pre-Installation Preparation
Before you can begin installing a new door, there are several essential steps to take in your pre-installation preparation. This includes gathering the necessary tools and materials, removing any existing doors or frames, and preparing the door opening. By following these steps, you will ensure a smooth and successful installation process.
Gathering Tools and Materials
To begin, you will need to gather all the necessary tools and materials required for the installation. Some of the essential tools you’ll need include a measuring tape, level, utility knife, hammer, chisel, power drill, and sawhorses.
In addition to these tools, you’ll need several materials, including:
- Door slab
- Door frame or pre-hung unit (if applicable)
- Casing or trim
- Hinges, if not included with the door
- Door hardware (handles, locks, etc.)
- Shims
- Wood filler or caulk
- Finishing nails or screws
- Paint or stain (if desired)
By gathering all of these tools and materials ahead of time, you will ensure a smooth transition as you begin your door installation project.
Removal of Existing Doors or Frames
Before starting the installation process, you will need to remove any existing doors or door frames. Begin by opening the door and removing any doorstops or molding attached to the frame. Next, carefully remove the screws holding the hinges to the door and door frame, then remove the hinges themselves.
If the door is extremely heavy, you may want to enlist the help of a friend or family member to avoid injury. Once the door is removed, carefully pry the door jamb away from the wall, taking care not to damage the wall or surrounding trim.
Preparing the Door Opening
Once the existing door and frame are removed, you’ll need to prepare the doorway for the new installation. Start by carefully measuring the height and width of the door opening, ensuring there is enough space to accommodate the new door and frame.
Next, make any necessary adjustments to the opening to ensure it is level and square. You may need to remove or add sections of drywall or trim, or use shims to level your opening. Once your door opening is level and square, measure the rough opening’s dimensions to determine the correct size for your new door and frame.
If the floor near the door opening is uneven, consider installing a new threshold or sill to create a level surface.
Installing Headers and Sill Supports
To provide structural support and ensure a proper installation, you will need to install headers and sill supports in the door opening. A header is a horizontal beam that spans the top of the door opening, providing support and preventing the wall from sagging. A sill support, or sill plate, is a horizontal beam that rests on the foundation or floor beneath the door, transitioning the door jamb to the flooring material.
To install the header, cut a 2×4 or 2×6 board to the width of the opening, then position it at the top of the opening, flush with the wall studs. Secure the header using screws or nails driven into the studs on either side of the opening. To install the sill support, cut a 2×4 or 2×6 board to the width of the opening, then position it at the bottom of the opening, level, and resting on the subfloor or foundation. Secure the sill support using screws or nails driven into the wall studs on either side of the opening.
With the headers and sill supports in place, you are now ready to continue with the door installation process.
Aluminium Sliding Door Assembly
Aluminium sliding doors are a popular choice for residential and commercial properties because of their durability, strength, and modern appeal. Assembling and installing an aluminium sliding door can be a straightforward process if you follow the steps properly. This article will guide you through the main steps of assembling an aluminium sliding door, including assembling the door frame, attaching the hardware, installing the track and rollers, and installing the door panels.
Assembling the Door Frame
- Gather necessary materials and tools: Before you begin, ensure you have all the necessary materials and tools for the job. This includes the aluminium sliding door kit, a drill with appropriate drill bits, screws, a level, a saw, a tape measure, and safety equipment such as goggles and gloves.
- Measure your opening: Measure the width and height of the door opening where the sliding door will be installed, considering any allowances for carpet or flooring. You may need to trim the aluminium door frame parts to fit your specific opening.
- Assemble door frame components: Following the manufacturer’s instructions, lay out the door frame components, which typically include the head, jamb, and sill. Ensure the head is level and the jamb is plumb. Connect these components using corner brackets or screws provided.
- Seal the frame: Apply weather-resistant sealant to any seams and edges of the door frame, especially at the corners where the head and jamb connect. This will help protect your door against any potential water leakage and air infiltration.
- Secure the door frame: Position the assembled door frame in the opening and ensure it is level and plumb. Attach the door frame to the surrounding structure using appropriate screws through the pre-drilled holes in the jamb and sill. Make sure that the door frame is secure and doesn’t move.
Attaching the Hardware
- Identify hardware components: Each door kit should include all the necessary hardware for installation, such as handles, locks, and strike plates. Identify and separate the different hardware components according to the instructions.
- Attach handles to the door panels: Carefully follow the manufacturer’s instructions to install the handles on the sliding door panels, ensuring they are attached securely and correctly.
- Install the lock set: Following the instructions provided, fix the lock mechanism into the door and secure it tightly. Make sure to test the lock and handle to confirm it works correctly and smoothly.
- Attach the strike plate: Position the strike plate on the jamb or head where the lock will engage with it. Secure it using provided screws and test it against the lock to ensure proper alignment.
Installing the Track and Rollers
- Install the upper track: Attach the upper track to the head of the door frame, either by clipping or screwing it in place. Ensure it is level and extends the full length of the door opening.
- Install the lower track: Position the lower track on the sill of the door frame and secure it using screws or clips, following the manufacturer’s instructions.
- Attach rollers to door panels: Fix the rollers to the top and bottom edges of each door panel, as per the installation guide. Ensure they are tightened securely and able to roll smoothly.
- Adjust the roller tension: Some roller systems require tension adjustments. Consult the installation manual to ensure the proper tension is applied, allowing for smooth door operation without excessive resistance.
Installing the Door Panels
- Insert door panels into tracks: Carefully lift each door panel and insert them into the upper and lower tracks. Ensure that the rollers are engaged with the tracks and the door panels are hanging vertically and evenly.
- Test door operation: Slide each door panel back and forth to confirm they are operating smoothly and without obstruction. Adjust the roller tension if necessary.
- Install door stops: Position the door stops at the desired locations along the tracks to control the movement of the door panels. Secure them using appropriate screws or clips provided.
- Inspect for gaps and alignment: Check for any gaps between the door panels and frame or any alignment issues, and adjust the door panels and rollers as required.
Your aluminium sliding door is now fully assembled and installed, ready to provide years of smooth and reliable operation.
Securing the Aluminium Sliding Door
Aluminium sliding doors are popular for their practicality, stylish appearance, and energy efficiency. However, to ensure the door is properly secured and functions smoothly, it is essential to follow a specific set of steps. This article will cover leveling and adjusting the door, fastening the frame to the structure, sealing the door, and installing a locking mechanism.
Leveling and Adjusting the Door
Before installing an aluminium sliding door, it is essential to level the door in its opening. Leveling ensures that the door will operate smoothly and prevent undue stress on the tracks and rollers. Start by measuring the opening to ensure it matches the door’s dimensions. Place the door in the opening and use a level to ensure it is plumb, both vertically and horizontally.
Next, adjust the rollers on the bottom of the door as needed to achieve the proper height and alignment. The rollers should be adjusted so that they sit evenly on the track without binding or causing undue friction. Use a wrench or pliers to turn the adjustment screws on the rollers to raise or lower them as needed. Be sure to adjust the roller in small increments to prevent over-tightening and to ensure smooth operation.
Fastening the Frame to the Structure
Once the door is leveled and adjusted, it needs to be securely fastened to the structure. Proper fastening ensures the door’s stability, longevity, and security. Start by pre-drilling holes in the frame at the correct locations for the fasteners. Use a drill and appropriate bit size to create the holes in the frame, ensuring they line up with the frame’s pre-punched holes.
Insert the fasteners through the holes and tighten them securely, being careful not to overtighten and damage the frame or the surrounding wall. Many aluminium sliding doors come with specially designed anchors or brackets that can be used in conjunction with the fasteners to secure the door.
It’s essential to use the correct type and number of fasteners recommended by the door manufacturer. This will help to ensure the door’s security and maintain any warranty provided.
Sealing the Door
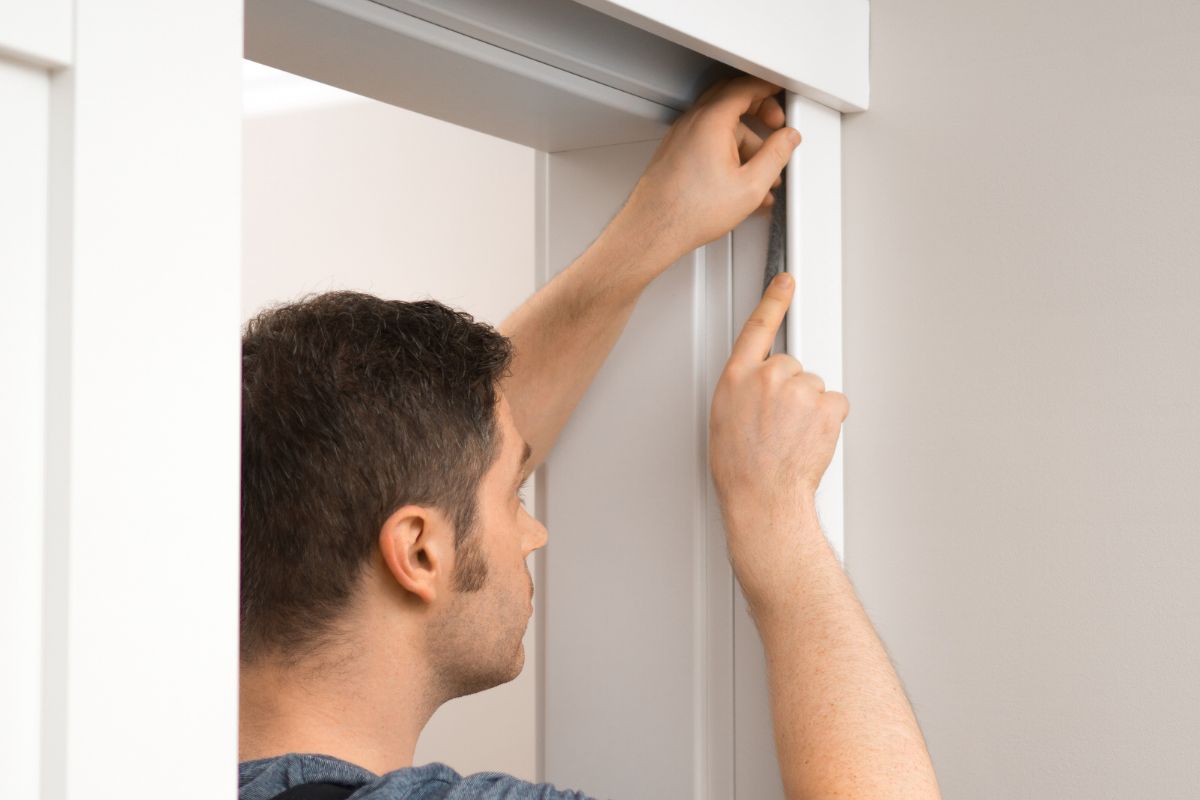
Ensuring that your aluminium sliding door is properly sealed will help to increase energy efficiency and prevent drafts, water intrusion, and pests from entering your home. Start by installing weatherstripping and a door sweep to the door’s edges to create an airtight seal.
There are various types of weatherstripping available, including adhesive-backed foam, V-strip, and door jamb gasket. Choose one that is suitable for your specific door and follow the manufacturer’s installation instructions.
Additionally, apply a bead of high-quality caulk around the entire perimeter of the door frame, both on the interior and exterior side. This will help seal any gaps between the door frame and the surrounding wall structure. Allow the caulk to cure for the recommended time before using the door.
Installing the Locking Mechanism
A secure locking mechanism is an essential component of any sliding door system. There are several types of locks available for aluminium sliding doors, including flush bolts, key locks, and advanced security locks. Choose a lock that meets your security needs and is compatible with your specific door model.
Follow the manufacturer’s instructions to install the lock on the door, ensuring it is securely attached and functions properly. In some cases, you may need to pre-drill holes or make other modifications to the door or frame to accommodate the lock. Double-check that the lock engages and disengages as it should, and securely holds the door in place when locked.
With these steps completed, your aluminium sliding door is now securely installed and ready for use. Regular maintenance, such as cleaning the tracks, lubricating the rollers, and checking for any signs of wear, will help to keep your door operating smoothly and securely for years to come.
Post-Installation Checks
After installing a new door, whether it’s an external or internal door, there are some post-installation checks that should be carried out to ensure the door functions as intended and provides the necessary features you require from it. These checks should be performed immediately after installation to identify any issues that may have emerged during installation, allowing for prompt rectification and ensuring your door lasts and functions for many years to come.
Below, we will discuss the post-installation checks you should carry out once your new door has been installed.
Inspecting the Door Alignment
The proper alignment of a door is crucial in ensuring it operates smoothly and doesn’t present any issues after installation. You should begin by visually inspecting the door, checking that it sits level and square within its frame. Then, use a spirit level to verify that both the door and frame are straight and level. You should also check the gap between the door and the frame, ensuring it is consistent around the perimeter and there is no excessive space or tightness that could lead to issues with the door sticking or not closing correctly.
If you find that the door is not aligned, it may be necessary to remove the door and either adjust or replace damaged or warped components. It’s essential to address these alignment issues early on, as a misaligned door can lead to more significant problems down the line, such as premature wear of components and stress on the door’s hardware.
Testing the Door Operation
Once you are satisfied that the door is correctly aligned, you should perform a series of tests to ensure it operates as intended. Begin by opening and closing the door, assessing the ease of operation and ensuring it doesn’t stick, squeak, or drag at any point in the process. The door should open and close smoothly without requiring excessive force or producing any unusual noises.
Also, check the door’s hardware, such as the hinges, knob or handle, and lock mechanism. The hinges should provide a smooth, even swing and should not squeak or creak during operation. The handle or knob should turn easily and without resistance, and the lock should engage and disengage smoothly.
Ensuring Proper Sealing and Insulation
One of the critical functions of a door is to provide an effective barrier against external elements, such as drafts, noise, and moisture. You should examine the door’s seals and draft stoppers to make sure they are functioning effectively.
For external doors, make sure the weatherstripping is in good condition and installed correctly. Use a piece of paper or a dollar bill: close the door on it and try to pull it out. If it comes out without resistance, the seal may not be adequate. For internal doors, check that there are no gaps around the door’s edges that could allow drafts, noise, or light to penetrate.
If you find any issues with the door’s sealing or insulation, you will need to address them by either installing or adjusting weatherstripping, adding or replacing draft stoppers or even replacing the door if the issues are too significant to rectify.
Verifying Security Features
Especially for external doors, it’s vital to ensure that your door’s security features function correctly to keep your home safe and secure. Inspect the door’s locking mechanism and make sure it operates smoothly, with the door securely latching into place when locked. You should also check any additional security features you may have installed, such as deadbolts, security bars, or smart locks, and ensure they are properly installed and fully functional.
By taking the time to perform these post-installation checks, you can guarantee that your new door not only looks great but also functions effectively and securely, providing you with the performance and longevity you would expect from such an important component of your home.
Maintenance and Troubleshooting
Proper maintenance and troubleshooting are essential for extending the life of your equipment and ensuring smooth performance. This involves regular cleaning and lubrication, replacing damaged or worn parts, adjusting and repairing hardware, and addressing any common issues that may arise. By keeping up with these tasks, you can prevent more significant problems from developing and keep your equipment running at peak efficiency.
Regular Cleaning and Lubrication
Cleaning and lubricating your equipment is vital in maintaining its functionality and preventing early wear and tear. Dust, dirt, and other contaminants can build up over time, leading to decreased performance and a higher risk of breakdown.
To maintain your equipment’s cleanliness, develop a regular routine that includes the following steps:
- Turn off and disconnect the equipment from any power source before starting the cleaning process. This ensures your safety as well as the protection of electrical components.
- Wipe the outer surfaces with a clean cloth or soft brush to remove loose dust and dirt. Be careful not to force dirt into any openings or joints.
- Depending on the type of equipment, you may need to disassemble the unit to access internal components. Refer to the owner’s manual or seek professional assistance if you’re unsure of how to do this.
- Use canned air or a vacuum cleaner with a brush attachment to remove dust from any internal components, such as fans or filters.
- Clean any accessible moving parts, including gears, belts, and pulleys, with a cloth or brush and mild detergent. Rinse with water and ensure they are completely dry before reassembling.
- Apply a thin layer of lubricant, such as silicone or lithium grease, to moving parts. This will help reduce friction and prevent wear. Be sure to use lubricants recommended by the equipment manufacturer.
- Reassemble your equipment, reconnect it to the power source, and turn it on to ensure proper function.
Replacing Damaged or Worn Parts
Damaged or worn parts can cause problems and even lead to equipment failure. Regularly inspect your equipment and replace any parts that show signs of wear or damage. This may include belts, gears, cables, bearings, wheels, or other components that are critical to the operation of the equipment.
Replace parts with new, high-quality components that meet or exceed the specifications of the original parts. Consult your owner’s manual or contact the manufacturer for guidance on sourcing compatible replacement parts. Keep in mind that using aftermarket parts may void any remaining warranty on your equipment.
Adjusting and Repairing Hardware
Over time, nuts, bolts, and other hardware may loosen or require adjustment. Regularly inspect your equipment and tighten any loose fasteners to maintain structural integrity and ensure smooth operation. Additionally, check for worn or damaged hardware that may need replacement or repair.
If you encounter problems with your equipment’s performance or functionality, troubleshoot the issue by consulting your owner’s manual or seeking guidance from a professional technician. Many issues can be resolved through proper adjustment, repair, or replacement of hardware components.
Common Issues and Solutions
Equipment issues can arise due to a variety of factors, but some problems are more common than others. Here are a few examples of common issues and possible solutions:
- Poor performance or strange noises: This may be due to dirt, dust, or debris buildup. Regular cleaning and lubrication can help prevent these issues.
- Overheating: Ensure your equipment has proper ventilation and is not placed in direct sunlight. Clean any vents, filters, or fans to promote airflow.
- Inconsistent or intermittent power: Check for loose connections, damaged cables, or faulty power sources. Replace or repair any damaged components as needed.
- Equipment not starting or shutting down unexpectedly: Inspect and replace any damaged or worn parts, such as belts or switches.
- Deterioration in quality or efficiency: Regularly perform maintenance tasks, including cleaning, lubrication, and parts replacement, to ensure your equipment remains in optimal condition.
By addressing these common issues and performing consistent maintenance and troubleshooting, you can extend the life of your equipment and maintain its overall performance.
FAQs on Installation requirements for Aluminium Sliding Doors
What are the necessary installation requirements for aluminium sliding doors?
To successfully install aluminium sliding doors, one must consider essential requirements such as accuracy in measurements, sufficient space for door panels, structural support from the building, proper floor leveling, and waterproofing. Compliance with local building codes and energy standards is also imperative.
How does one ensure accurate measurement for installing aluminium sliding doors?
Acquiring precise measurements for aluminium sliding doors involves recording both the height and width of the door opening at multiple points. Measure the frame’s width at the top, middle, and bottom, and the height at both sides and the middle, picking the smallest dimensions to ensure a proper fit.
What role does structural support play in aluminium sliding door installation?
Structural support is vital for aluminium sliding door installation, as the doors should be supported by suitable wall materials such as brick, concrete, or timber. Sufficient support accommodates the door’s weight, thus ensuring its stability and longevity, while reducing the risks of distortion.
How essential is proper floor leveling for aluminium sliding door installation?
Proper floor leveling ensures that the aluminium sliding doors operate smoothly across the floor track. An uneven surface can cause difficulties in door alignment, impairing functionality and compromising the door’s weather seals, leading to water infiltration and reduced energy efficiency.
What is the significance of waterproofing during the aluminium sliding door installation process?
Waterproofing is critical during aluminium sliding door installation to prevent water penetration and potential damage to both the door and surrounding structures. Proper flashing, sealants, and drainage systems must be used to preserve the longevity and overall performance of the sliding doors.
Related Articles